
We ourselves do not do sod installations, but below you will find information on how to properly install sod yourself. If you would like recommendations on landscapers that do sod installations please feel free to give our office a call and we would be more than happy to point you in the right direction.
Sod Installation
Laying sod is one of the least expensive landscaping projects you can do. It is important to start with the right sod, and to prepare the ground as best as possible. A few hours here can pay enormous benefits and time savings for years to come. This should be started in the days before your installation and completed in the hours before your sod is delivered.
Site Preparation
First, you need to remove all existing grass, plants weeds etc. This can be done with a pick, a spade, a sod cutter or a spray. You must also remove any roots, rocks or debris 1” (golf ball size) or bigger.
If you have a soil that has too much clay or sand this is when you should add topsoil or organic soil amendments. A good general rule is each yard of topsoil will provide a 3” coverage of 100 sq. feet. It takes 4" of topsoil to change the composition of the ground and it should be thoroughly mixed in.
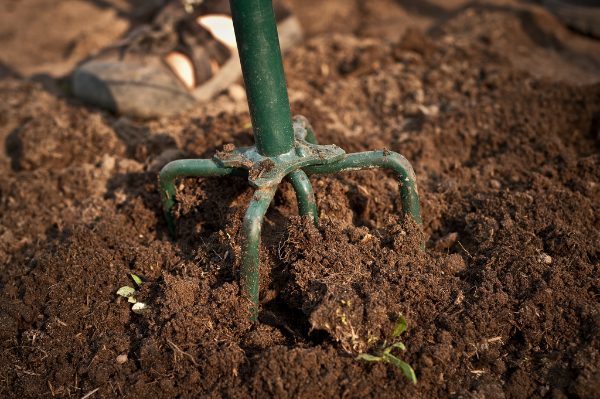
Once this is done you should “turn” the soil. You may do this by hand, rototiller or by tractor, depending on how compacted the ground is. The soil should be loose and aerated to a depth of 4-6” while keeping the grade to about 1" below sidewalks and driveways.
Last, depending on the time of year, you should put down an application of starter fertilizer on the bare ground. We recommend an 18-24-12 fertilizer using a rotary fertilizer spreader at the rate of one (1) 25lb bag per 4500 square feet. We do not recommend a high nitrogen fertilizer during the summer, it can lead to burning and can encourage the growth of brown patch.
Installation
Start laying your sod at a straight line, such as a driveway or sidewalk that is parallel with the street for best eye appeal. If needed you can use a string starting line.
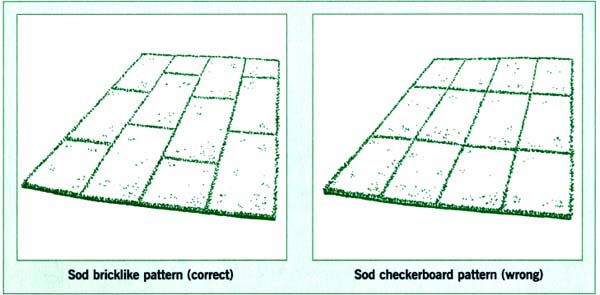
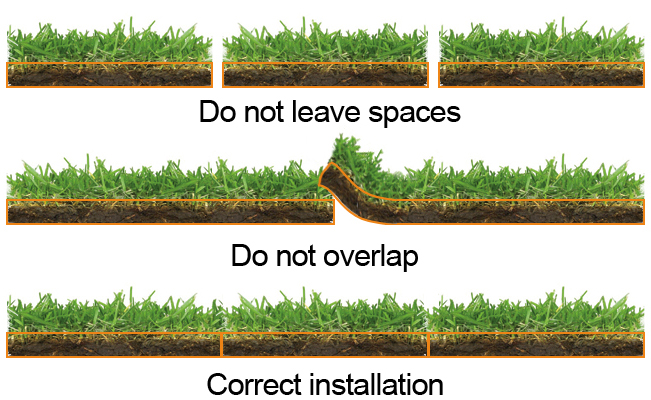
Stagger the joints in each row like bricks or roofing. Make sure all joints are butted tightly together, without overlapping or leaving spaces between the strips of sod. The tighter the installation the quicker the lines will begin to fade. Stagger the start of each new row so that the seams of touching rows do not line up.
Use a sharp knife to shape sod around tree rings, edging or bordering flowerbeds. Carpet knives or box cutters work best and you should be cutting on the dirt side of the sod.
Always use a plastic edging when a distinct border is desirable, otherwise the sod will grow into these areas very rapidly.
Rolling at this point is optional, however heavy watering will bring the sod down to the original grade.
It is important to water as you install by completing small sections and watering them before you begin to lay more. This is especially important in high heat and extreme weather conditions.
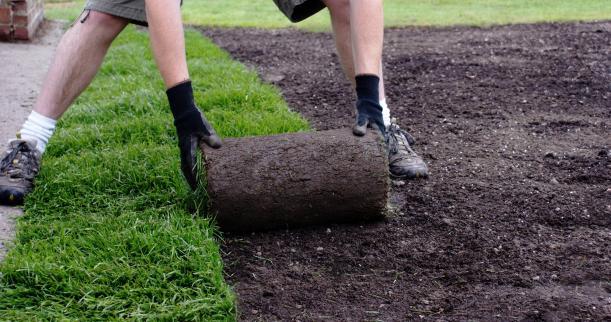
We always recommend that new sod is laid immediately and not left siting for any period of time. On the pallet the individual pieces of sod are rolled and stacked and if left like this for too long the sod will become over heated and suffocated.
After the sod is installed, the next two weeks are very critical. New sod should be kept moist for at least the first two weeks after installation. The amount of water needed depends on the temperatures during the day and the time of year.
During the spring and early summer water new sod twice a day for at least 30 mins at a time for the first 7 to 10 days and continue with 1'' per week throughout the rest of the summer.
During peak summer hours when temperatures reach 80 degrees+ new sod needs to be watered at least two times a day to keep it moist enough. Ideal times are between 10 am and 5 pm. THIS IS A MUST! The sod should start rooting down in 4 or 5 days
During the summer months we suggest you apply a fungicide to your newly installed turf in order to prevent brown patch disease.
Avoid walking or letting pets on to your new sod during this time as the heavy watering needed will cause the soil underneath to become soft and stepping on it may cause tears, divots or air pockets in the turf.
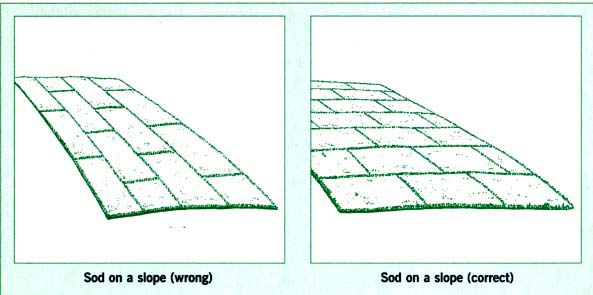
Sod pinning may be necessary on steep hills or slopes.

